Zenith's awesome website + PSP USB-C update
July 17, 2023
My good chum realjame showed me a new website this morning from this person named Zenith.

The homepage of zencorner.xyz
I just love the aesthetic of it, it looks really cool. The colors, the dithering effects, the way things are LAID OUT is really REALLY cool to me. I’ve been thinking of redoing my About Me page, and after checking out Zenith’s about me, I know exactly how to do it now, so I’m gonna steal their About Me (not really, but it’s awesome and I’m gonna try a similar layout). And the icons!!!

A section of the About Me page of zencorner.xyz
God, the icons are so neat! I don’t know, they’re just… cool! I think they get them from somewhere else from what I remember, but it’s really neat! I might look and see what those icons are about…
They also talk about the PSP! They happen to own a PSP 3000 (mystic silver) model, and they apparently use it for like music and stuff, which actually got me to redo my USB-C mod (which I’ll get into later). Their wife (known as Ashie) also has a pink PSP 3000, so that’s really awesome and cute!

The homepage of ashiecorner.xyz
But yeah, check out their site here and Ashie’s site here! Check Zenith out on wetdry.world as well!
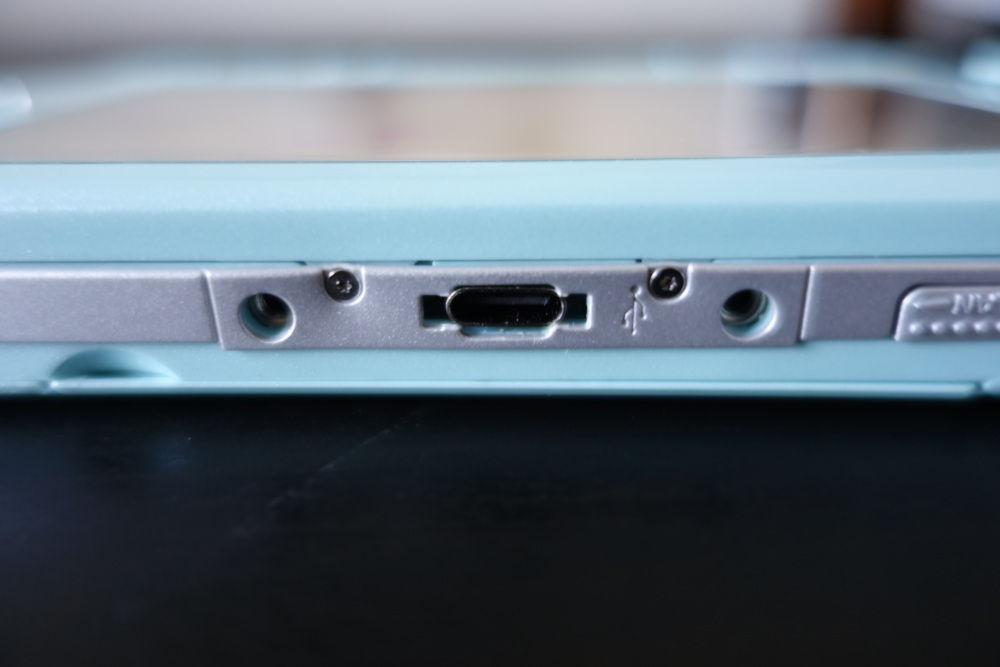
An update on the USB-C mod for my PSP
When I saw this person’s post about the PSP, I felt the need to work on my PSP’s USB-C mod again. Even the second time around, it didn’t satisfy me since
- The fit of everything inside was too tight
- The data lines on the USB port didn’t work
So I decided to redo the mod AGAIN this morning and finally got a result I wanted.
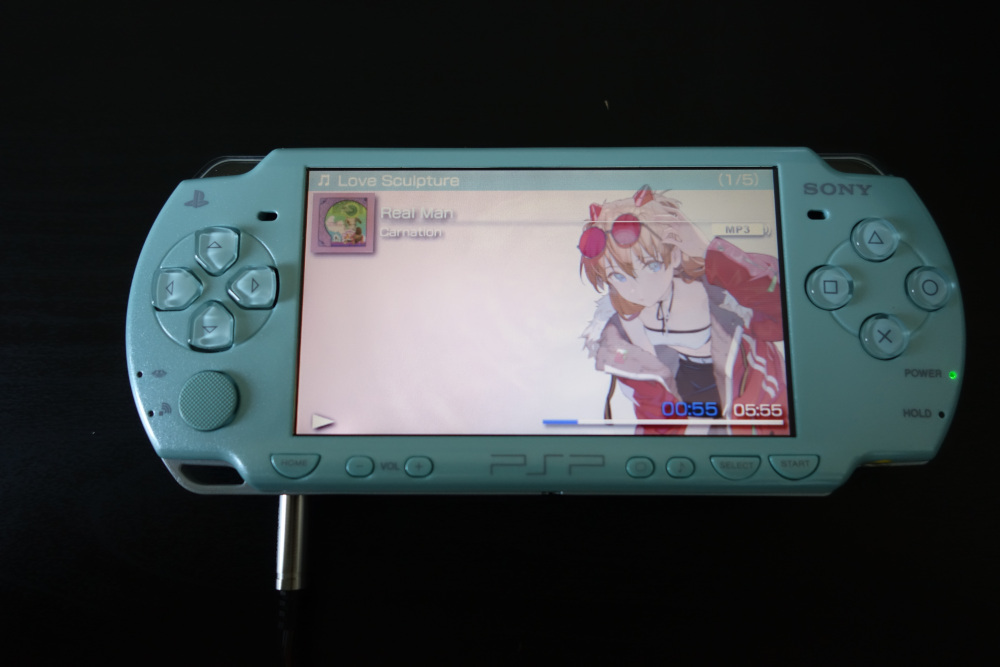
Trying out the music player after seeing Zenith's site
Overall, I’m impressed with the results. I did change a couple of things:
First of all, I forgot to wire the 5V from the USB port so I guess that’s why data didn’t work. So I wired both the 5V lanes from the USB and the power connector in order to get the full charging capability and also getting data to work on the port.
Next, to make everything fit better, instead of gluing the port to the board, I glued it inside the crevices where the old miniUSB port used to sit. That way, the glue didn’t interfere with the board and take up more space than needed. As a result, the case can now fully be screwed back on without any force.
So I’m very satisfied with how it all turned out. And uhh, yeah that’s it.